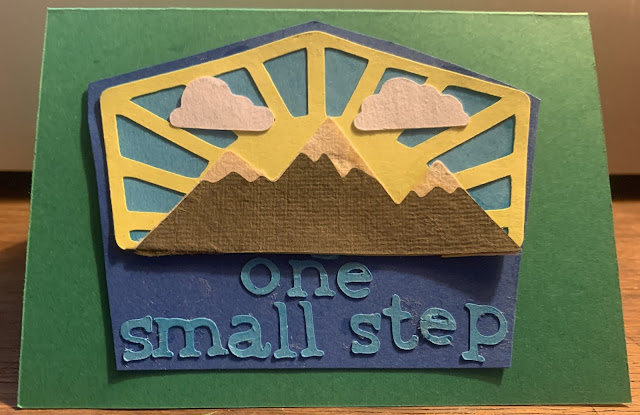
One small step
9/13/20: An updated version of this card can be found HERE.
My favorites of my Cricut cartridges so far is the Close to My Heart ones.
I hate that this is true because Close to my Heart (many times abbreviated CTMH) is a MLM company, meaning they make money by making their consultants buy products and the consultants make very little money for the products they sell.
The cartridges are quite expensive. However, each has 700 images on them, where regular Cricut cartridges have around 200 and personally I have really been drawn to the cuts on these cartridges. My mom lucked unto some that were used and got a really good deal is the only reason I have them, though I am considering buying one on clearance off the website.
Anyway, I didn't want to use them in this post without pointing out the type of company that sells them so that you can make an educated decision on if they are right for you.
Now that is out of the way, onto the card. I found this card idea on Pinterest.
Here is the link to the original
http://courtney-lane.blogspot.com/2015/09/cricut-artistry-create-your-own.html
She was able to use design space and edit the card a bit, I just went with what I could do without design space (as it is not available for my Cricut expression 2). While I like the look of hers better, I still like mine okay.
Side note: She is also a CTMH consultant. I do not know her but I think if I do decide to purchase that last cartridge, I will probably go through her (since I don't know any CTMH consultants myself).
She has instructions on her site for her version of the card, but it is much bigger than my version and I need a little more detailed directions as a beginner so I make sure that I get the card right next time.
I used the Artistry cartridge.
First the mountains at 1.25 inches from page 29.
I made the peaks (the non-shifted icon) out of a white paper that had some sort of shiny feathery look to it. This was problematic as the blade got caught on the feathery piece and it didn't cut really clean. It was still useable, but next time I may need to adjust the cut settings when dealing with this type of paper.
- side note the cut settings are one of the things I struggle the most. I am never sure when the paper is at a weight when I should make changes to the settings and many times I either do not cut through the paper fully or I cut too deep and cut into my mat (I have done both a ton, I just haven't gotten a good grasp yet).
I was going to cut the base of the mountain out of brown but did not have any and I found this olive color which I ended up liking.
Next, I cut the sky and sun portions of the card at 2.25 inches. Those were found on page 42.
Then I cut the clouds at 1/2 inch. I only did two clouds, one each of the ones on page 38.
Then the issues started
I tape rollered the sky to the card, but forgot that I had to cut off the bottom that extended past the mountain. I luckily was able to make the cut with scissors and only a tiny piece shows out of place (it is only barely visible above the n in one).
I used the glue pen for the sun since it had such small area to glue around the edges. I also used the glue pen on the mountain pieces as I figured the tape would have hated that feathery material. The glue was a bit of a mess though and even though it dried clear you could still see where it gushed out in places.
Then I came to the letters, there has to be a better way to do letters! I attempted glue pen, but it bubbled and got glue al over the first letter, so then I came up with the idea to use tweezers to hold the letter and then to swipe it over a glue stick. It was not pretty.
After letting it dry a bit, I determined the card was a glue mess, but I didn't want to give it up completely. So I ended up cutting it up and putting it on a different card which even though my hand cutting was not straight, I still kind of like the look. It is a bit thick having so many layers like that. Is it normal for cards to be so thick?
The inside sentiment I also found on Pinterest.
Random tip - I found out that the plastic sheet that covers the Cricut mat is not the same on both sides. One side sticks much harder and I read can potentially hurt the mat. Other bloggers say that they are able to feel the difference in the sides or some other way can tell. I, on the other hand, cannot tell the sides apart until it has been stuck, so I labeled the side that should be out with a sharpie. If I would have thought about it a little more, I could have put a decorative sticker or something prettier. However, this is still very functional for me.
I liked ending the last post with an LGBT+ book so I think I am going to continue that for as long as I have books to recommend. This next book is "If I was your girl" by Meredith Russo, a transgender woman writing about a transgender teen. A warning, reading this as a mom (and a mom of teenagers at that) this book had me in tears.


Comments
Post a Comment